

How To Cut A Section Out Of A Picture In Photoshop
How To Cut Out An Paradigm In Photoshop – 5 Easy Ways
Let's larn how to cut out an image in Photoshop. If y'all don't know where to start or aren't certain which method is best to remove a background from your photograph, this guide will take all your answers.
There are a multifariousness of tools that can cutting out an image in Photoshop. Each tool will accept its pros and cons depending on the paradigm you lot're trying to cut out. The all-time method to cutting out an epitome will depend on how complex the areas effectually your discipline are.
Luckily for you, cutting out an image in Photoshop is a 'hurting-gratis' process; if you choose the right tool. Let'due south dive in and learn about the all-time ways to cutting out photos and objects in Photoshop.
Psst, if you lot're new to Photoshop there'due south something awesome for y'all at the bottom of this article…
1.Cutting Out Images With The Quick Option Tool
What is the Quick Selection Tool?
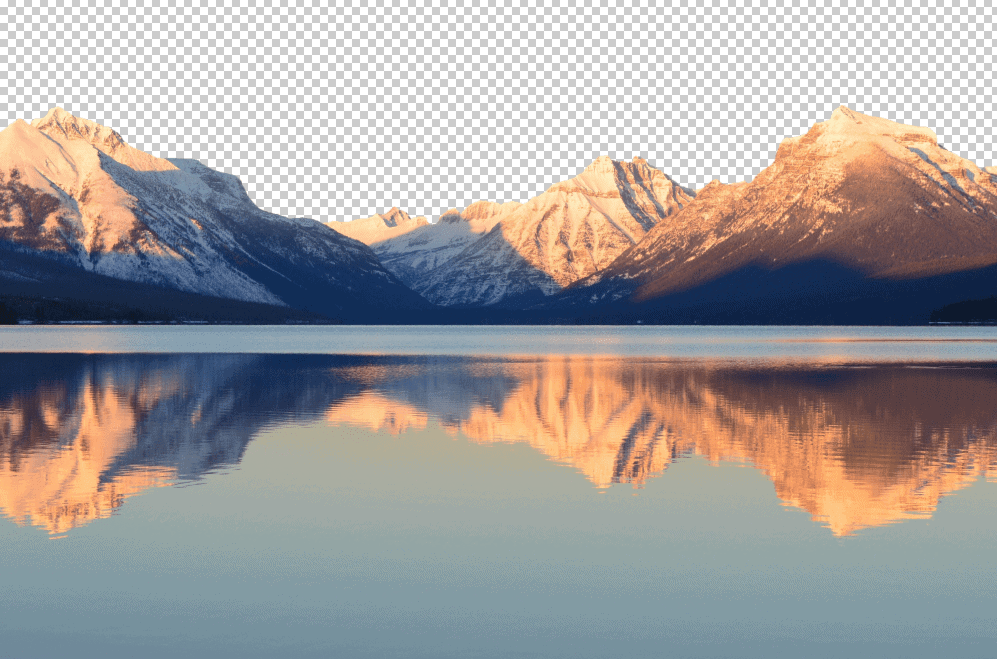
The Quick Option tool is ane of the easiest ways to cutting out an paradigm in Photoshop. This tool allows you lot to essentially pigment a option onto your image. The Quick Selection Tool works best when there is a divers edge around your subject.
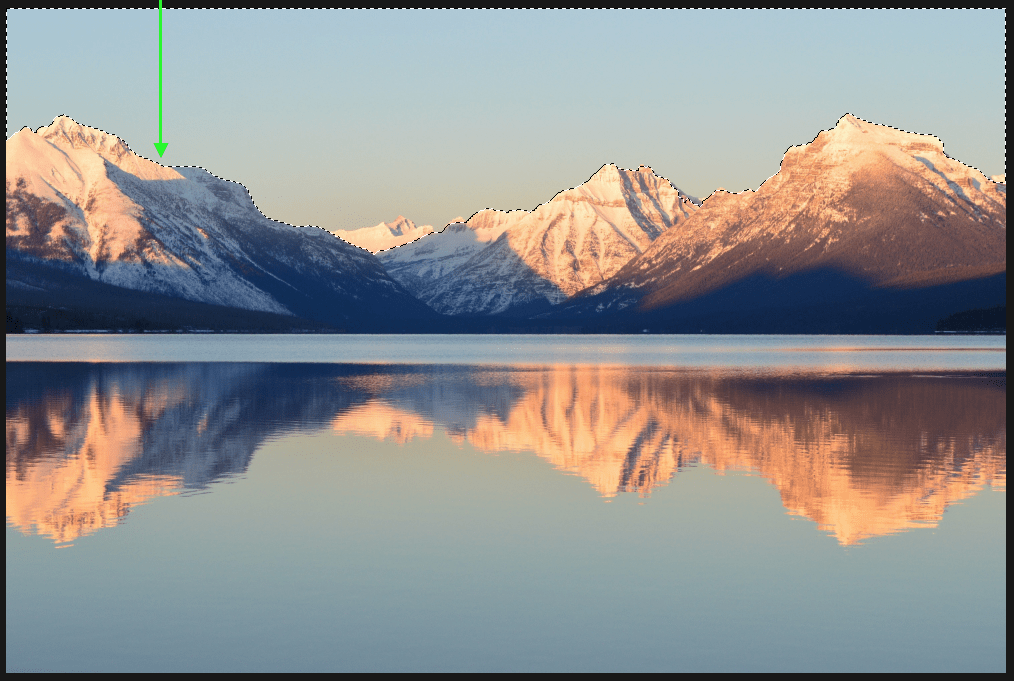
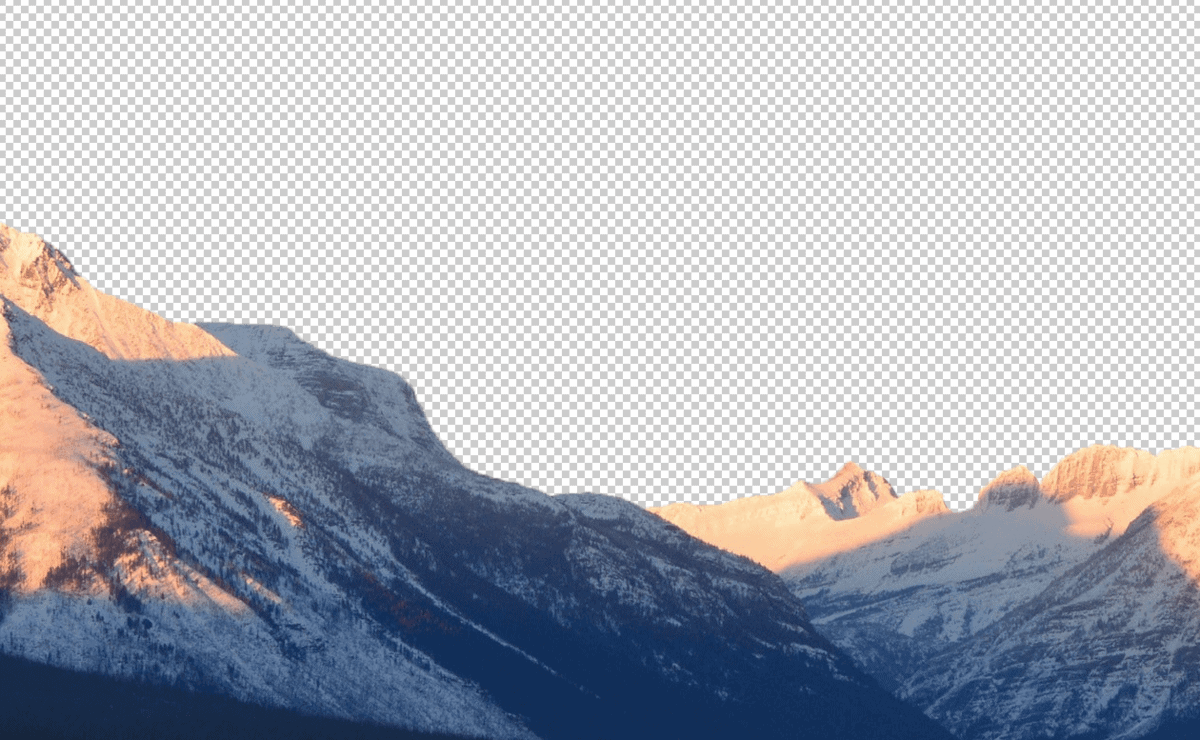
For example, a defined border could be mountains confronting the sky. There is a clear and obvious edge for Photoshop to automatically select.
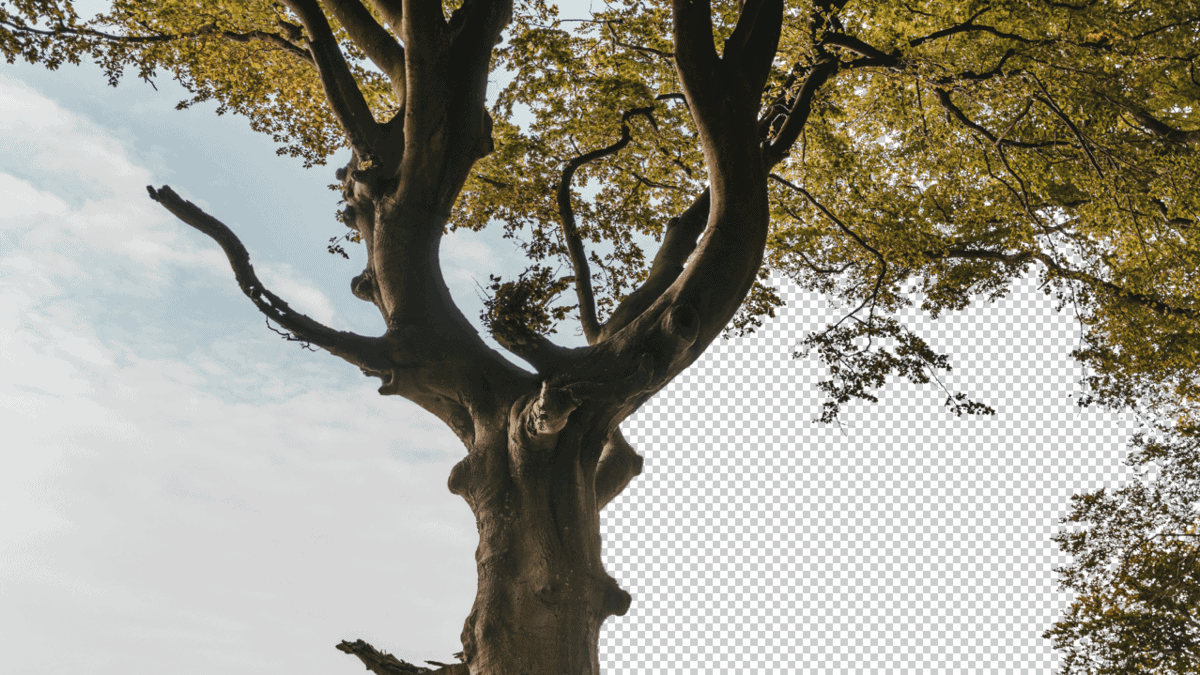
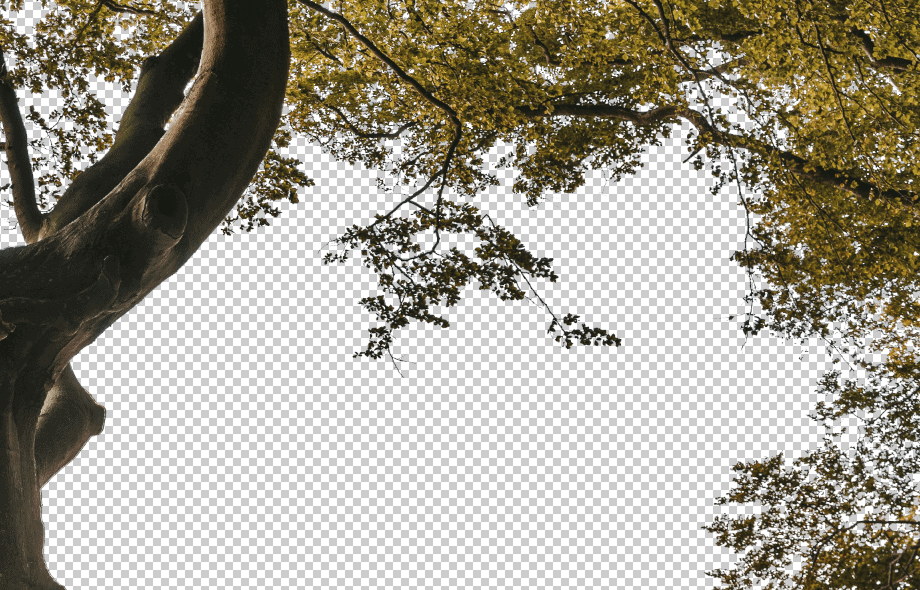
An undefined edge would be something like trying to cutting out this tree confronting a busy background. The Quick Pick tool would accept a difficult time deciphering the differences betwixt the tree trunk and a like background.
How To Access The Quick Pick Tool In Photoshop
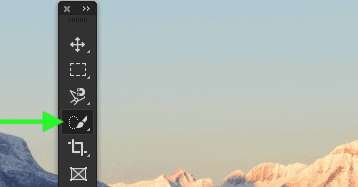
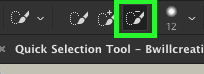
You can admission the Quick Selection tool on the elevation of your toolbar. The toolbar is establish on the left-hand side of your Photoshop window. The Quick Selection tool is represented by a paintbrush and circular selection icon.
You can chop-chop admission the Quick Selection tool by using the keyboard shortcut W.
When To Use The Quick Selection Tool In Photoshop
The Quick Selection Tool is a fast and effective way to cut out an image in Photoshop. Although it may need a flake of edge refining to be perfect, it's a very viable option for cutting out whatever object with a defined border.
The Quick Selection Tool works best when cutting out defined objects against make clean backgrounds, shapes, and horizons.
How To Cut Out An Image With The Quick Choice Tool
Step 1: Access The Quick Selection Tool
Access the Quick Selection tool past pressingWon your keyboard. You tin can also find it in the toolbar.
Footstep 2: Ensure your Quick Option toolbar settings are correct
Once yous've accessed the Quick Pick tool, a settings bar will appear at the tiptop of your screen. This is where yous can cull how the tool operates.
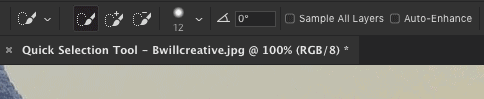
Make certain the icon with the plus signis selected so you can add a new pick. Next, y'all accept the option to change the brush settings. What I find works best is a 50% hardness and i% spacing for the most accurate results.
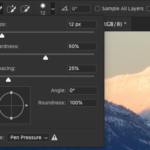
The best brush size will depend on the area y'all are trying to select. Y'all can change the brush size at whatsoever time using the subclass keys, [ or ].Some other option is simply using the brush size slider in the upper toolbar.
Stride iii: Paint Your Selection Around Your Subject field
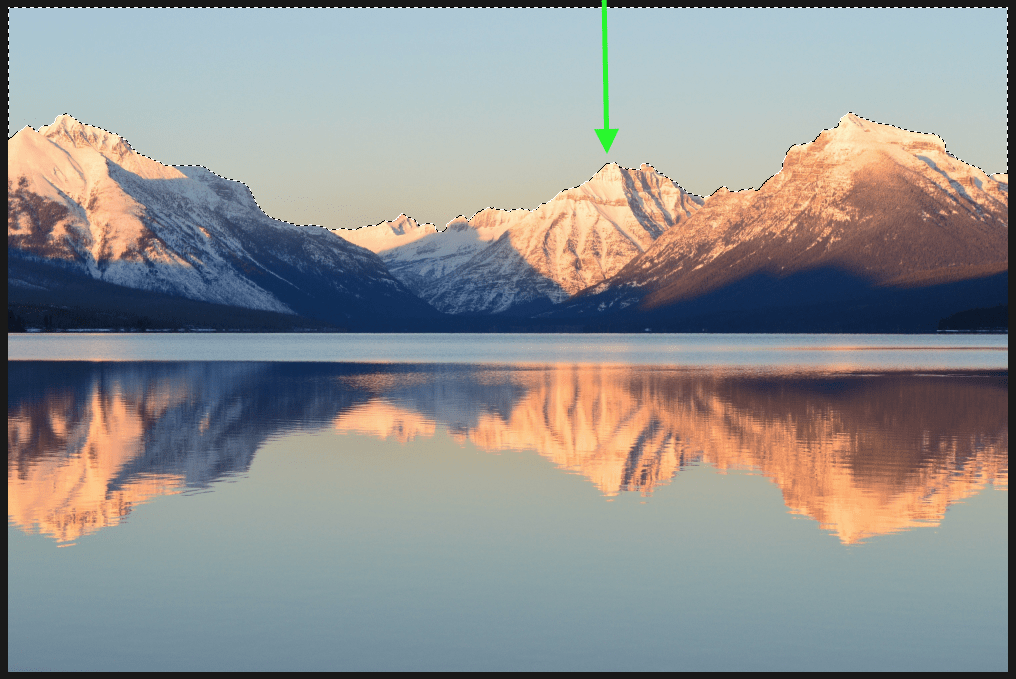
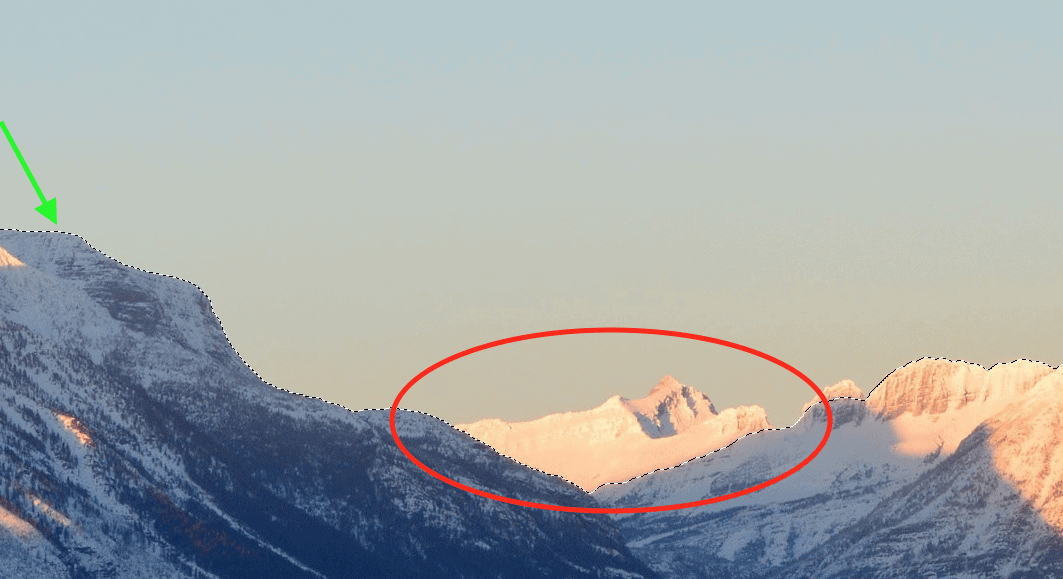
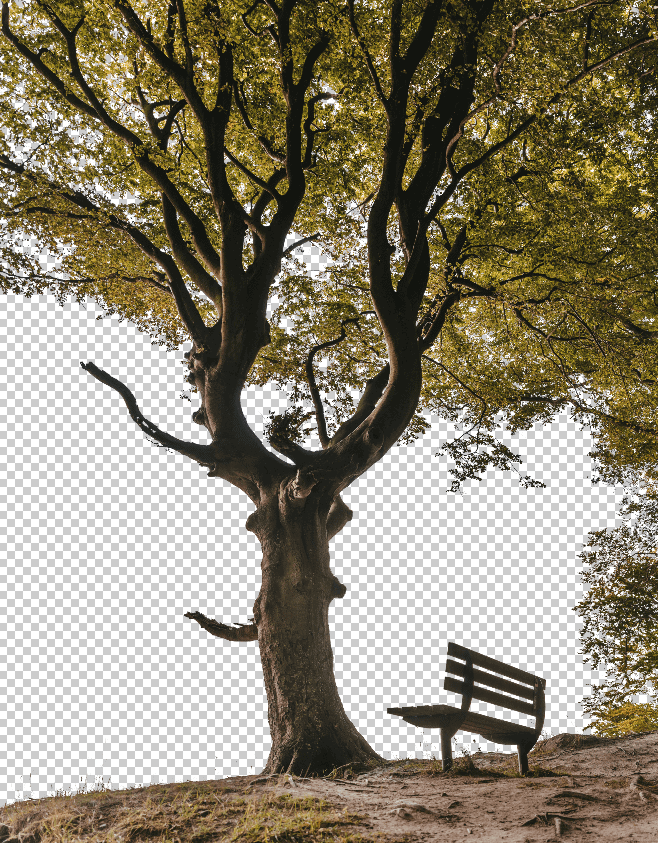
With your Quick Selection tool settings in social club, it's time to paint your selection. Follow along the edge you are wanting to select, taking care non to overlap the brush with your border. Become effectually the entire subject until your option looks something similar this:
Stride 4: Refining Your Selection
Although the Quick Selection tool does a pretty good job, it's unlikely the selection will be perfect correct away. You may need to get rid of part of the option, to improve fit around your subject.
To get rid of a selection made with your Quick Selection tool, only agree Selection (MAC) or ALT (PC) to erase parts of a selection. Detect how my castor tool icon changes from a plus to a minus.
If you don't like shortcuts, you can as well go to the tool settings bar and click the icon with the minus symbol.

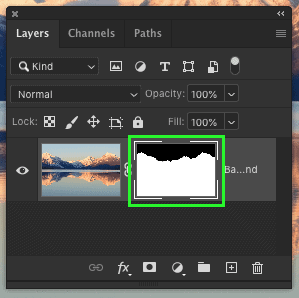
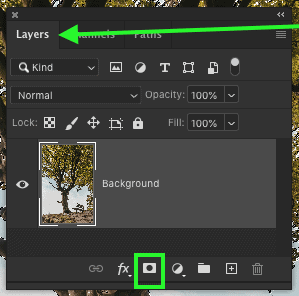
Step 5: Use Selection Onto A Layer Mask
Once you are happy with your selection, information technology's fourth dimension to apply information technology to a layer mask. With your desired layer selected and a selection active, click on the layer mask icon. The option will automatically become transferred onto this layer mask.
If the result is the opposite of what you are wanting, click on your layer mask and press Command + I (MAC) or CONTROL + I (PC) to capsize your layer mask.
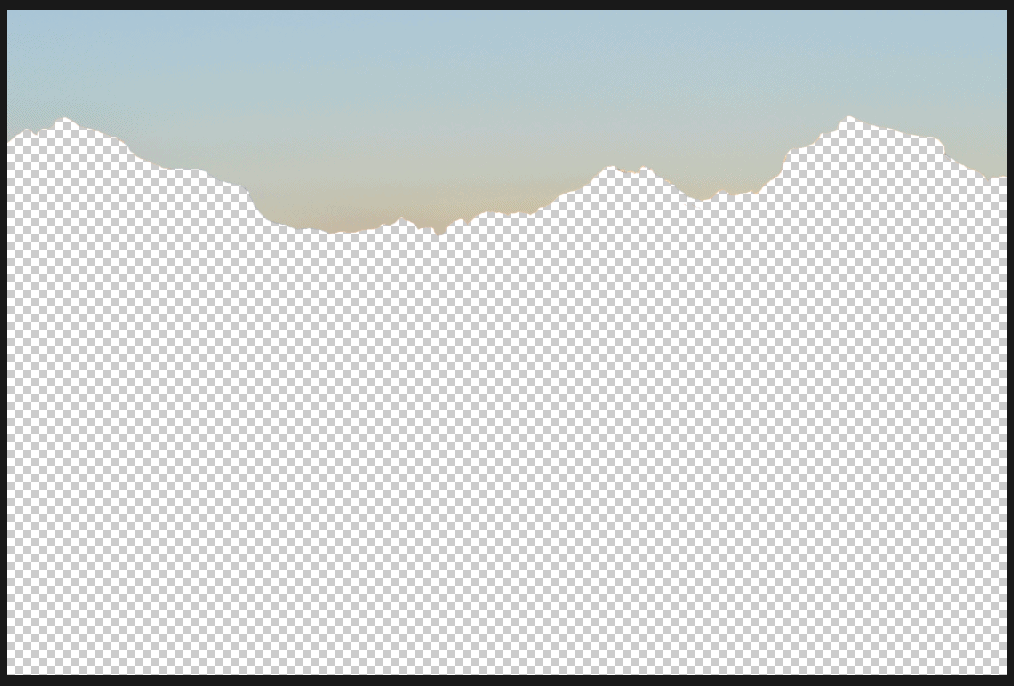
In this example, merely my sky was visible on my layer mask. I inverted my layer mask to show the part of my paradigm I wanted to cutting out.
Benefits To The Quick Selection Tool In Photoshop
The Quick Selection tool is one of the fastest means to make a customizable choice in Photoshop. Although it automatically makes selections around your subject, you are still in command of how and where that choice is being applied.
The Quick Selection tool is ideal for fast image cut-outs and background removals. It is 1 of my nigh used tools when I need to chop-chop cutting out an image in Photoshop with little to no hassle.
Downsides To The Quick Option Tool In Photoshop
Although it is in fact "quick", equally the name suggests, what you lot gain in speed you lose in quality. It can often be difficult to perfectly select an edge, and your selection may jump effectually to areas you don't want to exist selected. The concluding downside is that the Quick Selection tool will often get out your prototype with jagged and rough edges when zoomed in.
Fortunately, this result can exist quickly resolved using an border refining trick. It's the trick I've used to make my Quick Selections flawless and more than professional. Click here to learn how to enhance the Quick Selection tool.
2. Cutting Out Images With The Object Selection Tool (Photoshop CC 2020)

What Is The Object Option Tool In Photoshop?
The Object Selection Tool was newly introduced to the plan in the latest Photoshop CC 2020 update. Unfortunately, if you are operating in an older version, this tool won't be available to you.
The Object Pick tool works by automatically snapping to the edge of your subject. You lot can ascertain the choice area with two modes that act similar to the marquee and lasso tools.
The Object Selection tool is a great alternative to the Quick Selection tool and requires far less manual painting. With the object selection tool, you define an expanse and Photoshop will do the residuum.
How To Admission The Object Selection Tool In Photoshop
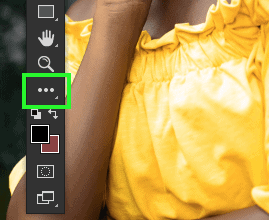
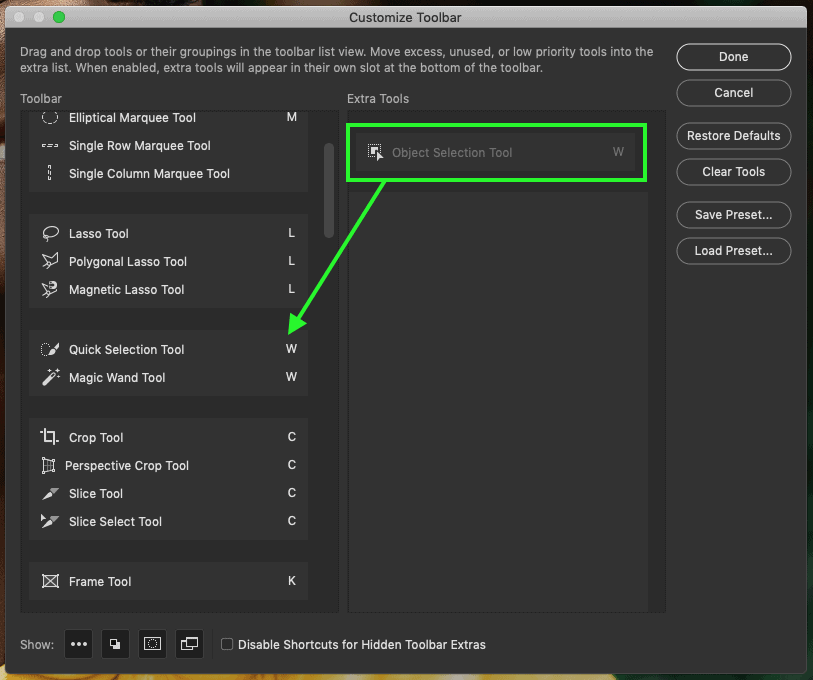
The Object Selection Tool may not exist automatically bachelor to yous. Y'all'll take to add together it to your toolbar. You can exercise this past clicking on the three horizontal dots at the bottom of the toolbar. Click and hold these dots to select 'Edit Toolbar'.
A dialogue box volition appear and you volition observe the Object Selection Tool in the right console. To add it to your main toolbar, click and elevate the tool over to identify it among your Quick Option tool and Magic Wand tool.
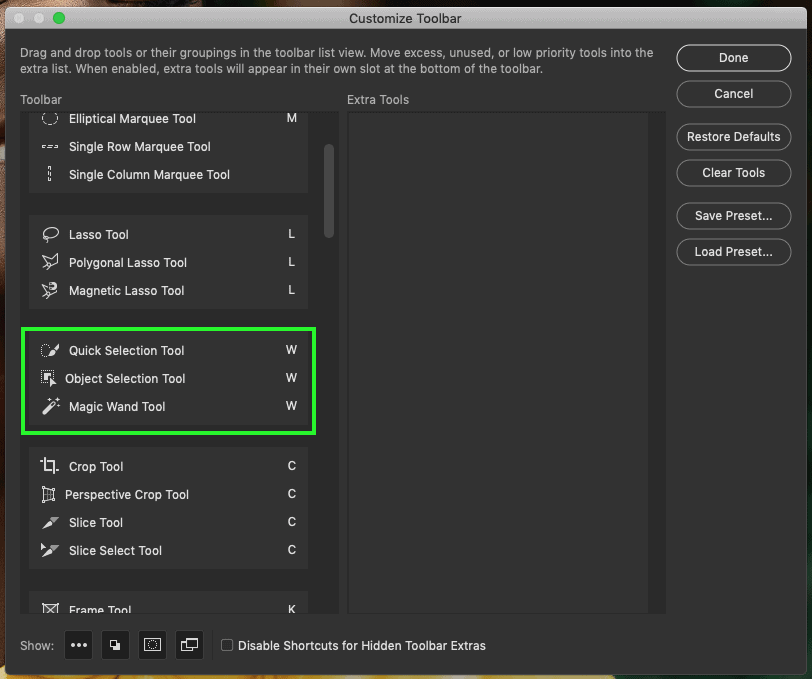
Now you tin can access the Object Selection tool from your toolbar.
When To Use The Object Selection Tool
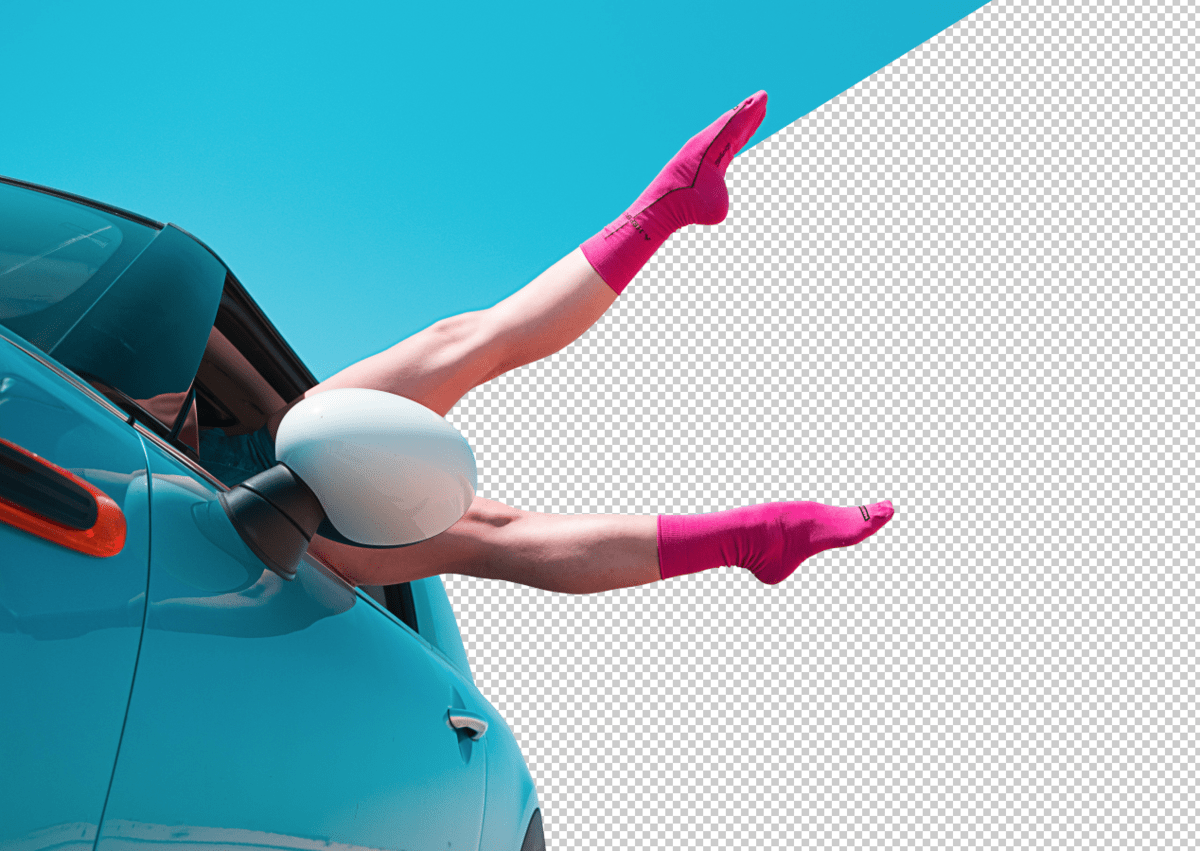
So when is best to use the Object Selection tool? If you are wanting to rapidly cut out a person, even confronting a decorated background; this is the tool to do it. Different most car-choice tools in Photoshop, the Object Pick tool does a remarkable task to ascertain edges and snap a selection to it.
The Object Pick tool works best when cutting out images of people, horizons, and objects against a relatively make clean background.
How To Cut Out An Image With The Object Selection Tool
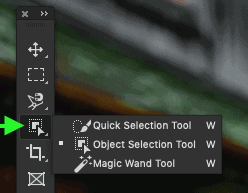
Step 1: Access The Object Option Tool
Admission the Object Selection tool by pressingWor clicking the Object Selection tool icon in your toolbar.
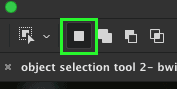
Pace 2: Ensure Object Pick Toolbar Settings Are Correct
Once you have selected the Object Selection tool, a settings bar volition appear at the top of your Photoshop window. This is where you tin can change the fashion and selection method.

To get your selection started, make sure the unmarried foursquare icon is selected. This option allows yous to create a new selection.
Pace 3: Choose Your Selection Mode
Side by side, select your desired fashion. You have two options: the rectangle or the lasso mode. The rectangle mode works a lot like the rectangular marquee tool. This pick lets yous describe a rectangular selection around your subject field, and information technology will automatically snap to the edges.
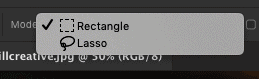
The lasso mode allows you to hand draw a line to create a selection. Manually describe the lasso around your subject and finish by connecting both ends. This choice will automatically snap to the edges of your subject.
Personally, I prefer using the rectangle mode for its ease of utilise. Play effectually with both modes to see which works best for y'all.
Stride 4: Create Your Selection
Click and drag to create your selection. In this example, I am creating a rectangle around my subject by clicking and dragging. Once the whole subject is within the rectangle, I let go of the mouse and Photoshop automatically selects the edges of my subject. It typically does an impressive chore.
Stride five: Refine Your Selection
Like all automatic selections in Photoshop, they need a niggling fleck of refining. In this example, a lilliputian bit of the edge got missed.
You can easily add together to your selection past holding SHIFT (MAC and PC) or take abroad from a option by holding Selection (MAC) or ALT (PC).
You can also become to the settings bar instead of using a keyboard shortcut. The solid double foursquare represents adding a selection, the single solid and single transparent foursquare represents subtracting your selection.
Refine your selection by drawing near the edge of your active selection. Information technology volition add or subtract depending on your toolbar settings. Continue this procedure until yous're happy with the selection.
Step 6: Add Selection To Layer A Mask
With your selection agile, select the desired layer and add a layer mask.
The selection volition be automatically transferred onto the layer mask and cutting out your image. If the result is the opposite of what y'all are wanting, click on the layer mask and press Control + I (MAC) or Control + I (PC) to invert the layer mask.
Benefits To The Object Selection Tool In Photoshop
The Object Selection tool in Photoshop makes clean automatic selections with less work than whatever other tool in the program. With the Object Pick tool, you lot tin can cut out an paradigm with almost no attempt.
The ii choice modes work smashing to easily define the area or subject you want to select. I love using both the selection modes together to get great automated image cutouts in Photoshop.

Overall, the Object Choice tool is fast, authentic, and works great if yous don't want to spend the time with more lengthy option methods like channels or the pen tool.
Downsides To The Object Pick Tool In Photoshop
Although the Object Pick tool makes make clean selections, it tin be dull to perfectly select an edge. Even with constant refining, Photoshop can still struggle to perfectly snap to the border of your subject.
Constantly trying to refine your border can become abrasive when Photoshop simply doesn't seem to know exactly what you want. Fortunately, this isn't a regular occurrence with the Object Selection tool. It typically will figure out what you're trying to achieve after a few attempts at refining the selection.
3.Cutting Out Images With Channels
What Are Channels In Photoshop?
Channels are a characteristic that breaks down your paradigm into three color channels; the Reddish, Green and Bluish channels. Together these channels make upward all the colours in your image.
Individually, these 3 channels stand for varying layers of dissimilarity in your paradigm. Y'all can leverage this contrast to create highly accurate selections to cut out images in Photoshop.
How To Admission Channels In Photoshop
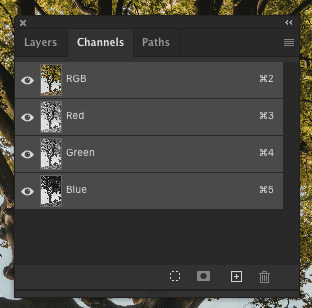
The channels tin can exist accessed in your layers panel. At the pinnacle of your layers panel, you will notice a tab that reads channels . Click that tab to access your channels.
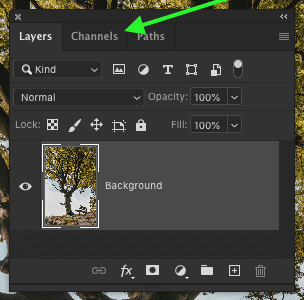
Unfortunately, at that place is not a native keyboard shortcut to admission the channels feature in Photoshop.
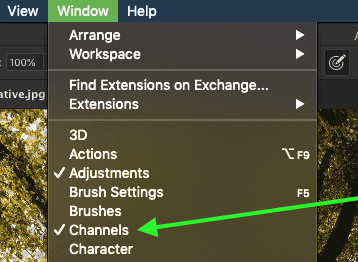
If yous do not meet your channels in this location, go up to WINDOW > CHANNELS to get access.
When To Use Channels In Photoshop
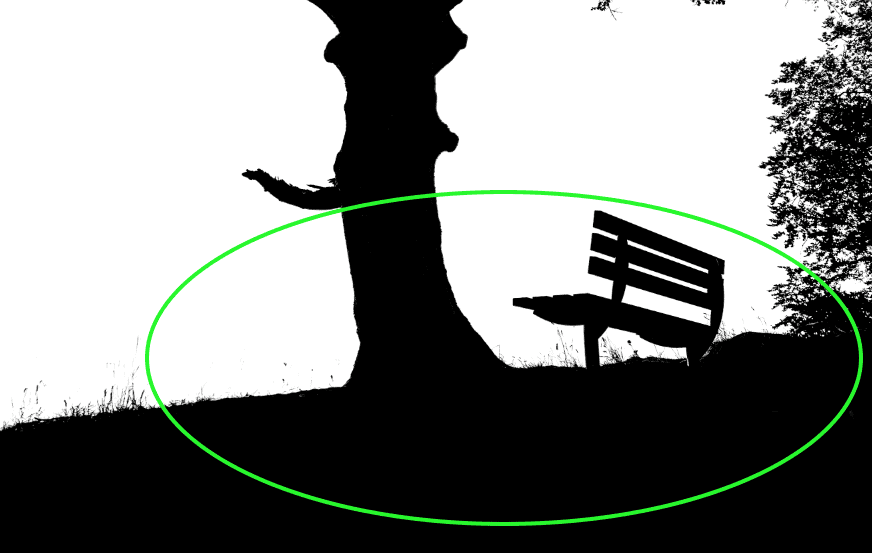
Channels are near useful when you want to cutting out complicated images with high contrast. For example, a tree sitting confronting a sky, a person against a light coloured wall, or the silhouette of something against a bright groundwork.
Retrieve, this tool operates primarily through natural contrast. The more variance in your photograph, the easier fourth dimension channels will have to cut it out. I personally love to use channels when I have a complicated choice like tree branches or pilus.
How To Cut Out An Image Using Channels
Footstep one: Access Your Channels Tab
Access your channels tab past click on the channels tab in your layer panel. If yous do not come across this tab, go to WINDOW > CHANNELS.
Step two: Select the Color Aqueduct With The Most Contrast
Click on each aqueduct thumbnail to run into which ane has the most contrast between black and white. When you click on a aqueduct thumbnail the image will modify from colour to blackness and white. Don't worry, you didn't do anything wrong; this is supposed to happen.
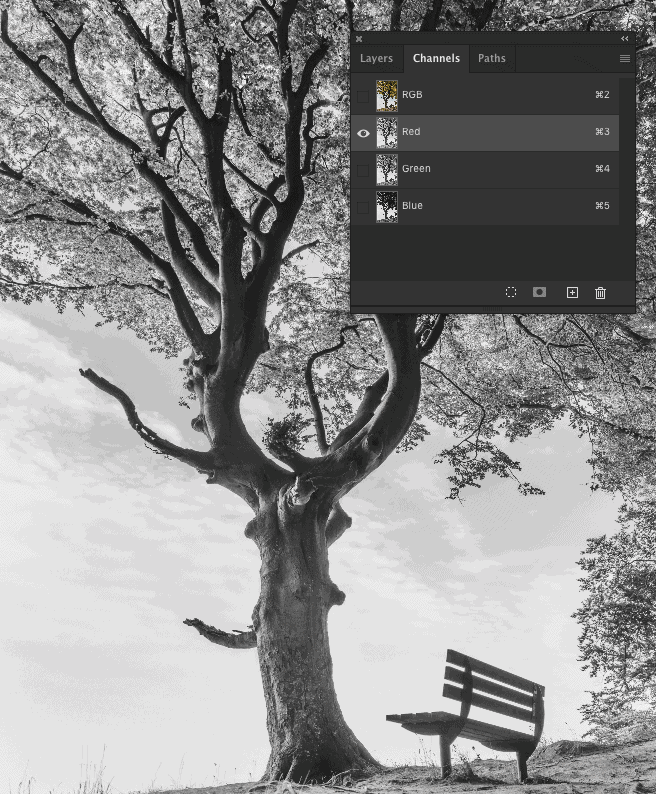
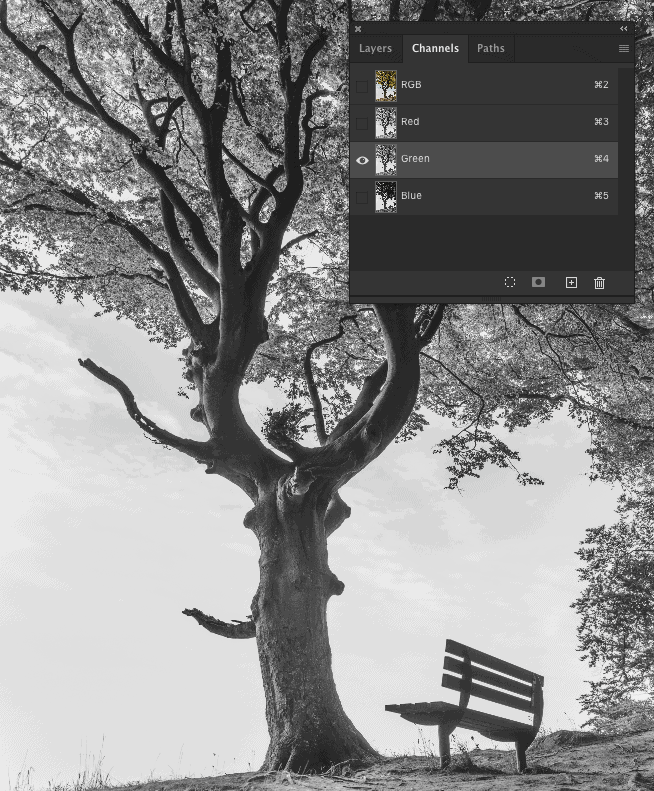
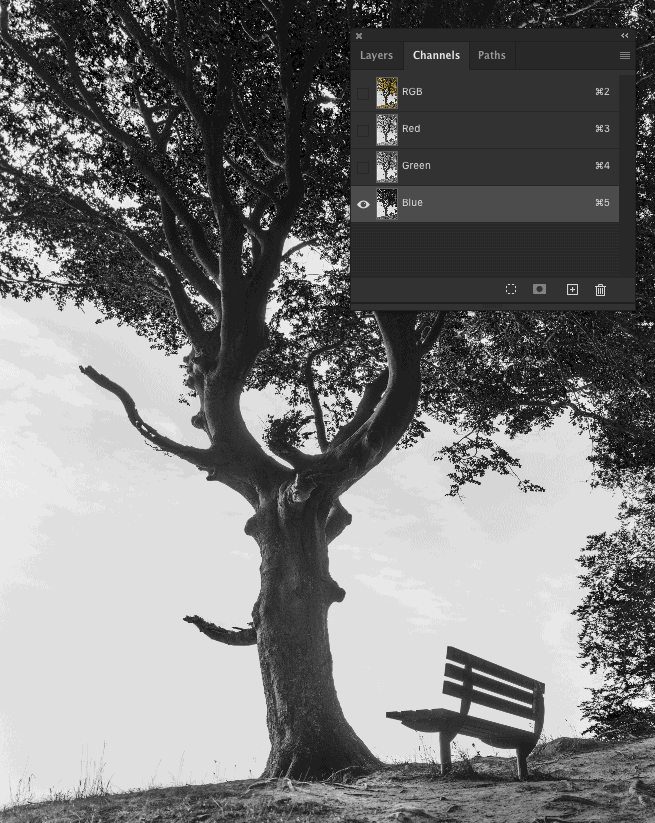
In this example, the colour aqueduct with the most contrast is the blue colour channel.
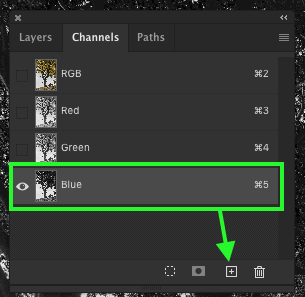
Step 3: Duplicate Selected Colour Channel
Select the layer channel with the most dissimilarity. Click and drag this color channel downwardly to the new layer icon at the bottom of your channels window.
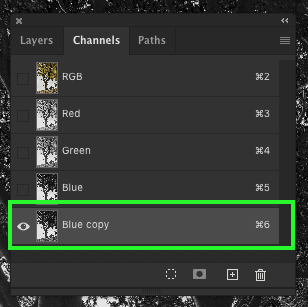
You will at present take a duplicate of your colour channel. In my example, I now have a Blue Channel Copy.
Pace 4: Add More Contrast With Levels Aligning Layer
Click on your duplicated channel layer. With this layer selected, printing COMMAND + L (MAC) or Control + 50 (PC) to bring up your levels aligning layer.
Increase your highlights and shadows range until your prototype is completely black and white with equally little grey as possible. Ensure the edges around the object are clean and not broken apart by as well much dissimilarity.
One time happy with levels adjustments, click OK.
Footstep 5: Refine Black And White Areas With The Brush Tool
Remember to think of your prototype as a layer mask. Anything white will exist visible, anything that is blackness will exist transparent. There are likely areas of white or black where there shouldn't be. In this example, there is white leftover on the within of the area I desire to go on.
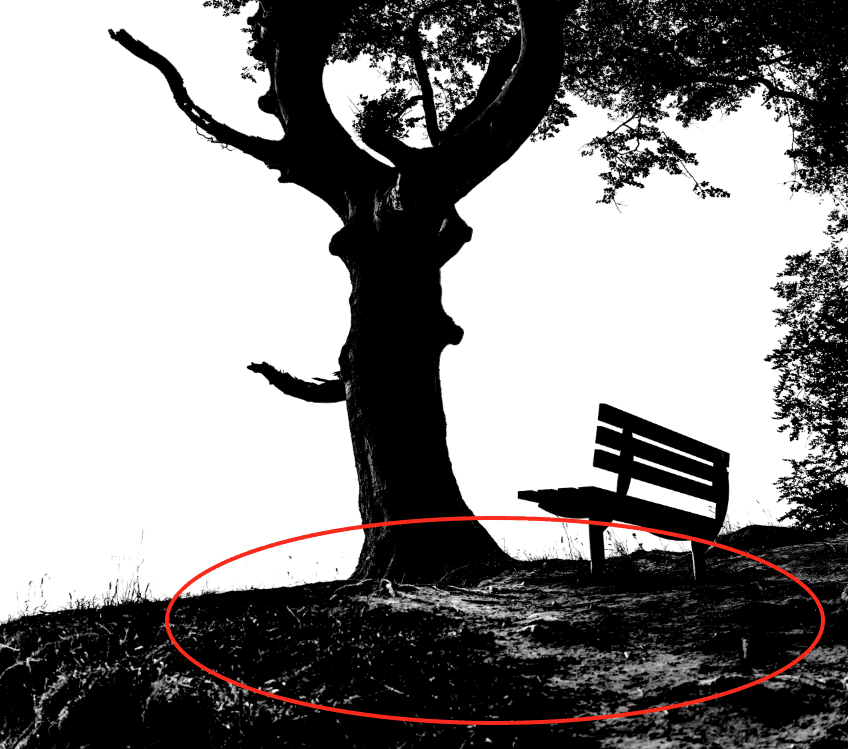
It's an easy fix to touch this upwardly, just catch your castor tool by pressing B and set your agile colour to white or blackness. Pigment over necessary areas as needed, making an effort to have the to the lowest degree grey leftover every bit possible.
Step six: Turn Your Aqueduct Into A Choice
One time you are finished refining the 'mask' your aqueduct copy has created, it's time to turn information technology into a choice. To activate a selection, concord COMMAND (MAC) or CONTROL (PC) and click on your channel layer thumbnail.
Photoshop volition make a choice of your channel layer based on the black and white in your image. With this active selection, click back to your layers tab.
Step seven: Add Agile Selection Onto A Layer Mask
Now dorsum in your layers tab, select the desired layer you want to cut out. With this layer selected, click on the layer mask icon to utilize your selection onto a layer mask.
Now you accept successfully cutting out your image! If the opposite of what y'all are wanting appears, select the layer mask and press Control + I (MAC) or CONTROL + I (PC). This volition invert your layer mask.
If necessary, you tin farther refine your selection by painting white or black onto your layer mask with the castor tool.
Benefits To Cutting Out Images Using Channels
A huge do good of cutting out images using channels is that you can make very complex selections in a flash. Since the entire tool operates using contrast, you lot don't demand to get into the piddling details to manually select anything.
This tool is absolutely crucial if yous are wanting to cut out complicated objects like a tree or pilus in Photoshop. No other tool will be able to define small edges better than the channels tool. It is a serious game changer once you lot use it to your workflow.
Downsides To Cutting Out Images Using Channels
Of grade, nothing tin can exist totally perfect. Channels are no exception. The downside to cutting out images with channels is that the epitome needs to accept natural contrast. This method will not work in dark images where the edges you want to select are non easily defined.
Another indicate to call up is to not add together as well much contrast with your levels adjustment. If you lot add too much contrast, it will destroy tiny edges such every bit leaves or tree branches. While you are calculation this initial contrast, you lot demand to keep a very shut eye that small details remain intact.
Unfortunately, it can be very easy to overdo the amount of contrast. This makes for a bit of a hassle keeping a shut eye on the fine details.
four. Cutting Out Images With The Pen Tool
What Is The Pen Tool In Photoshop?
The Pen tool is one of the nigh versatile tools in Photoshop. If you desire to brand a selection with a flawless edge, this is the tool for y'all. The Pen tool can feel like a bit of a acquit when you kickoff utilize information technology, just with some time, it will become the nearly valuable cutout method in your Photoshop toolkit.
If you are completely new to the Pen tool and how it operates, I would strongly advise reading my previous commodity that goes in-depth on how the Pen tool operates. This guide volition help you become from a total newbie to a confident professional. Check out my Pen Tool Essentials Guide Here.
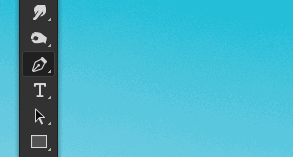
How To Access The Pen Tool In Photoshop
The Pen tool can be accessed in your toolbar, represented by the sometime fashioned ink pen icon. You can also utilise the keyboard shortcut P to access the Pen tool.
When To Use The Pen Tool In Photoshop
The Pen tool is all-time used when automated selections merely won't practice the trick. If you don't desire any mistakes made in your choice, the Pen tool is the answer.
The Pen tool works well to cut out an image in Photoshop considering the selection is fabricated manually. You are in accuse of manually cartoon the pen path effectually your field of study; this makes a piddling more than work simply assures you you'll get an extremely accurate selection.

You tin employ the Pen tool in just about any situation y'all see fit. It works best to cut out people, curved edges, defined edges, or objects against complicated backgrounds.
How To Employ The Pen Tool
Step ane: Admission The Pen Tool
Access the Pen tool by clicking on the Pen tool icon or pressing P.At that place are several versions of the Pen tool, but we volition exist sticking with the regular Pen Tool for this tutorial. You can learn most the other Pen tools here.
Step 2: Create A Pen Path Around Your Bailiwick
Outset, ensure your Pen tool is set to Path.

Create a Pen path around your subject field by clicking to add an anchor point. Move your cursor forth the edge of the subject and add another ballast point. Continue this process all the fashion around the field of study.
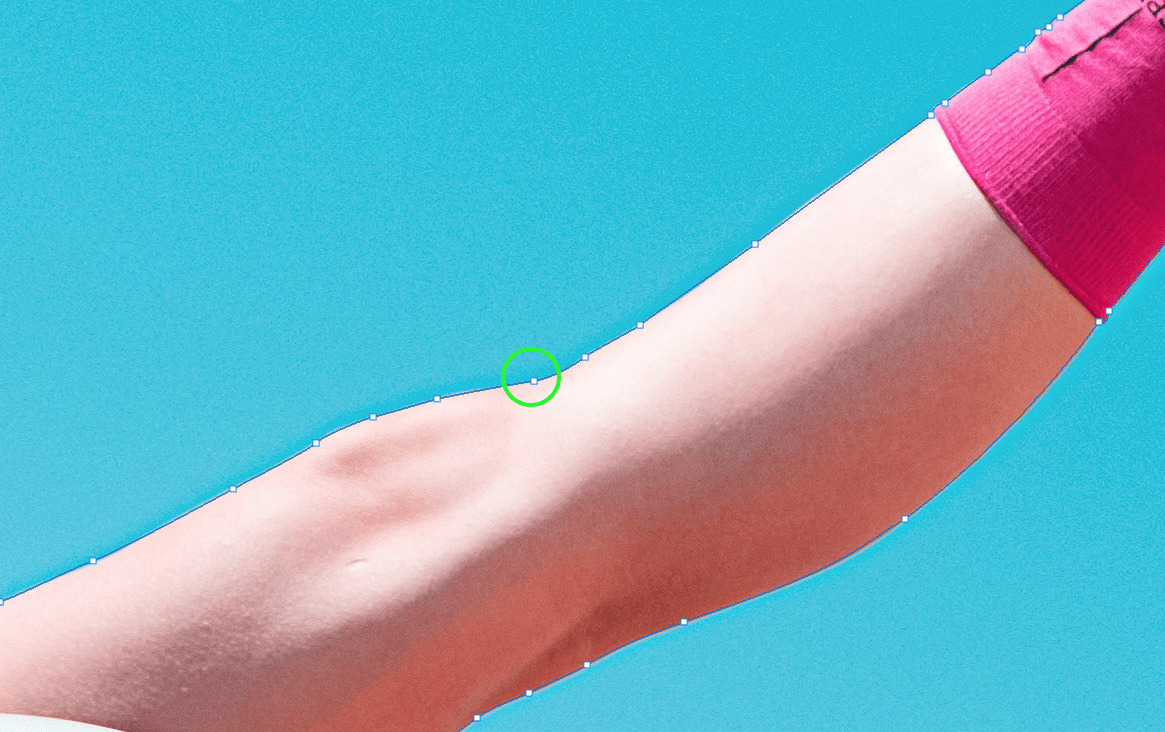
Pen paths will automatically grade straight lines between 2 anchor points. That definitely won't work for 99% of the images you endeavor to cut out. Non to worry, you lot tin can curve the pen path past clicking and dragging when you place a new anchor point.
When y'all curve your pen path, you will notice your anchor point at present has 2 control arms. These artillery can be adapted at any time to later refine the curve of your pen path.
Y'all can concur COMMAND (MAC) or Command (PC) and click on the command arm to change both arms at one time. This will modify the curve on both sides of your anchor.
What if you only desire to affect one side? Hold OPTION (MAC) or ALT (PC) and click on the edge of the control arm to adapt one side of the bend.
If yous are feeling overwhelmed at this betoken, check out my Pen Tool Essentials Guide to assistance with anything you may be struggling with.
Try to stay on top of making your pen path as accurately equally possible. This way you won't demand to go back later on and refine anything. Spend time now, salvage fourth dimension later.
Pace 3: Complete The Pen Path
To complete a pen path, keep adding anchors around your subject until you connect back to your beginning ballast point.

Footstep 4: Create A Option
With your pen path completed, yous'll need to plough information technology into a selection. Correct-click inside of your pen path and select 'Brand South election'.A option dialogue box will appear. Set your feather radius to 0.5 and leave anti-aliased checked off.
Next, make sure your operation is set to 'New Selection'. Click OK.
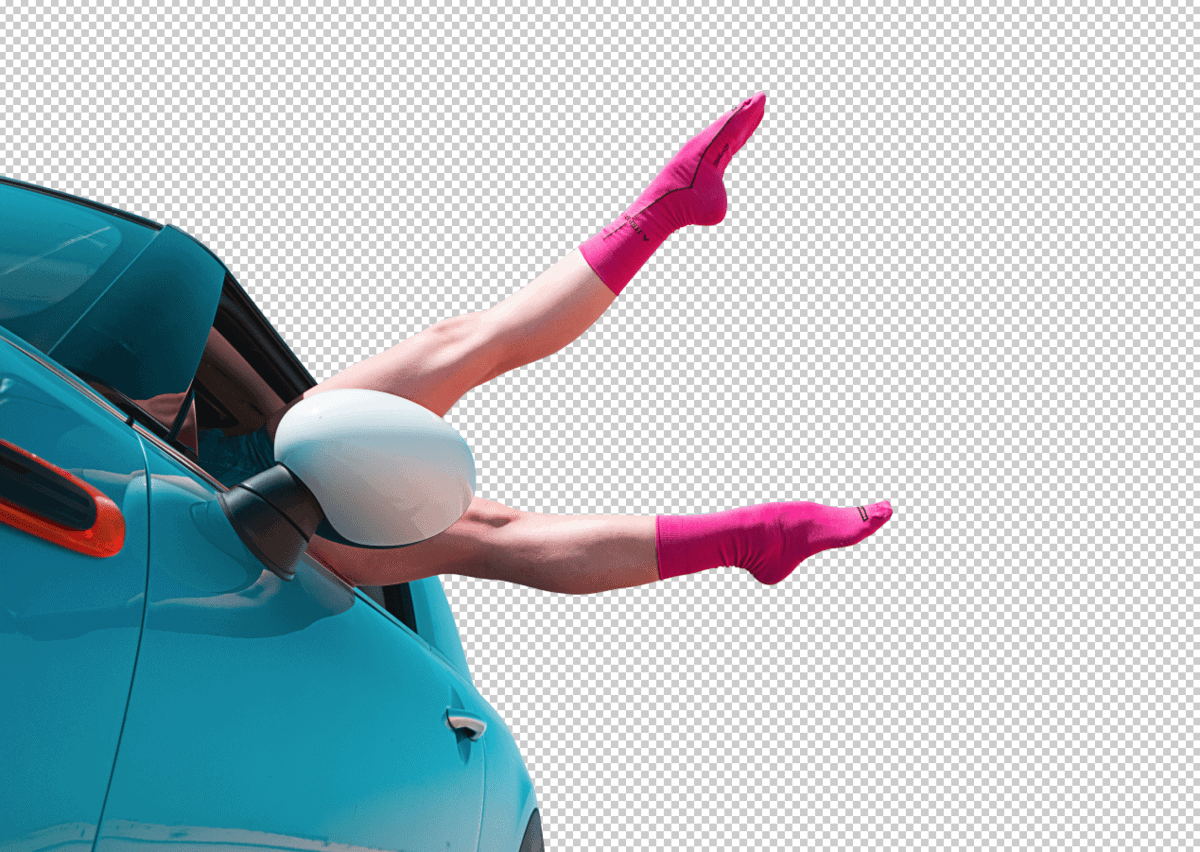
Pace 5: Utilise New Pick Onto A Layer Mask
With your selection active, select the layer yous want to cut out. With the desired layer selected, press the layer mask icon. Your active selection will exist automatically practical to your layer mask.
Voila! You have merely learned how to cutting out an epitome in Photoshop using the Pen Tool.
Benefits Of Cutting Out Images With The Pen Tool
The huge benefit of cut out images with the pen tool is the quality. By manually creating a pen path you are telling Photoshop exactly where you want to select. You don't take to rely on any fancy computer software to go it correct. It's only you and your two eyeballs calling the shots.
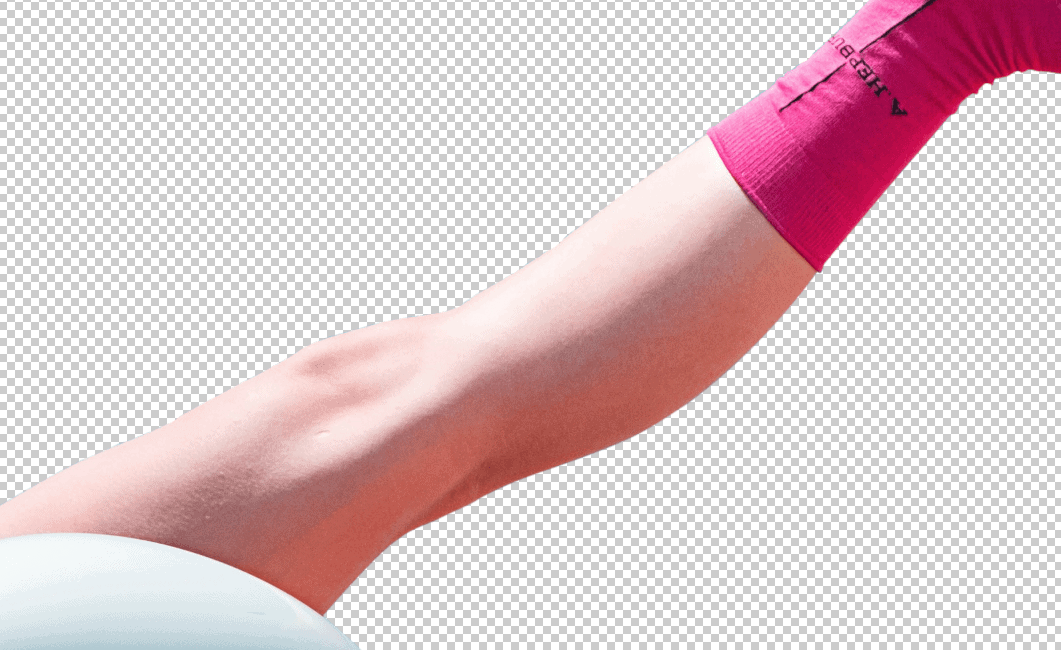
The Pen tool leaves your cutouts with flawlessly smooth edges and admittedly zero mistakes. There's a lot less refining involved with this cutout method since you tin manually refine equally you lot create the pen path.
Downsides Of Cutting Out Images With The Pen Tool
As cracking equally this tool is, information technology's likewise extremely time-consuming. If you are only looking for a quick method to cut out an image in Photoshop, the Pen tool isn't the option for you. This method takes some serious patience and dedication to get that perfect option. Only is it worth information technology? Of course.

5. Magnetic Lasso Tool

What Is The Magnetic Lasso Tool
The Magnetic Lasso tool acts very similarly to the pen tool, except it'south automated. This tool automatically snaps to divers edges in your image and creates anchor points forth the mode. It's a fantastic way to cut out an image in Photoshop if you are looking for a tool that's almost automatic but nonetheless want some control.
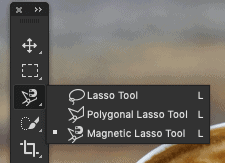
How To Access The Magnetic Lasso Tool
The Magnetic Lasso Tool is probable hidden if y'all haven't used it earlier. You'll find it aslope the Lasso Tool at the elevation of the Photoshop toolbar. Click and hold on the Lasso tool and a little window will appear beside the toolbar. Go downward and click on the Magnetic Lasso Tool.
Yous can also use the shortcut SHIFT + L to cycle through the Lasso tool options instead.
When To Employ The Magnetic Lasso Tool
The Magnetic Lasso tool performs all-time when there is a generally defined edge around your subject. Yous are able to manually tell Photoshop where you want the path to follow, so the Magnetic Lasso tool does its best to snap to the edges it recall you desire.
This tool is a dandy manner to cut out an epitome in Photoshop. It performs well if the object has a moderately defined edge and is great if you want more than control over the selection or y'all want a fast and accurate cutout.
How To Use The Magnetic Lasso Tool
Stride one: Admission The Magnetic Lasso Tool
Access the tool by pressing L or going up to the elevation of the toolbar and manually selecting the Magnetic Lasso Tool Icon. If you practice not encounter this tool, press SHIFT + L to cycle through the Lasso tool options.
Stride two: Ensure Magnetic Lasso Tool Settings Are Correct
Before you create a choice, you'll want to dial in your settings. At the summit of your window is the settings toolbar.
Make sure you accept the single solid square selected to create a new option.

Set your feather to either 0 or 0.5 and keep anti-aliased checked. I like to proceed my width at 10px, contrast at 10% and frequency betwixt 50-seventy.Feel free to experiment with these settings to run across what works best for you.
Step 3: Create Your Selection
To create a option with the Magnetic Lasso Tool, information technology's very simple. Click once forth the edge of the object y'all want to cutting out. From there, but elevate your cursor effectually the edge of your field of study.
Here's where you'll start to understand why it's chosen theMagneticLasso tool. As you drag the cursor, the lasso tool will automatically snap to the edges you are tracing forth.
If you don't like part of your selection, you can press delete on your keyboard to become back to the last anchor point. If you detest the selection altogether, press the escape key to get rid of the entire choice.

Continue tracing around the edges of your subject until you get back to the starting signal. This will complete your selection.
Step four: Apply Active Pick Onto A Layer Mask
With your selection complete, allow's add it to a layer mask. Select the desired layer you want to cut out and click on the layer mask icon. Your active option volition be transferred onto this layer mask.
Nailed it! You just learned another method on how to cut out an image in Photoshop.

Benefits Of The Magnetic Lasso Tool
The benefits to the Magnetic Lasso Tool is the fact you lot can accept better accuracy, without all the work. All you have to do to define an border is trace around information technology; the Magnetic Lasso tool does the rest.
How keen is that?
This tool offers a unique manner to create fast, reasonably authentic selections; nearly automatically. If you want similar control to the Pen tool, with more automated results like the Quick Selection tool, this is the tool for y'all.
Downsides Of The Magnetic Lasso Tool
This tool can be a little bit choosy. It will snap onto shadows or unwanted areas effectually your edge. It can feel like tedious work constantly deleting recent points and trying once again.
The Magnetic Lasso Tool has its definite advantages for fast selections, only it isn't always able to make the all-time choices. To make the most out of this tool, y'all need to play to its strengths. Those strengths existence precipitous, well-divers edges.
What's The Best Tool To Cut Out An Epitome In Photoshop?
So we just covered how to cut out an image in Photoshop in 5 different methods. So you're probably wondering…
What tool should I utilise?
When it comes to cut out images in Photoshop, it's important to have a wide array of tools fo the job. By practicing and agreement each of the tools outlined in this article, y'all'll exist able to utilise different tactics to perfect cut out any prototype in Photoshop.
Ultimately, the all-time tool will always depend on the needs of the epitome. Yous want to play into the strengths of the tool. For instance, yous wouldn't want to employ the Quick Selection tool to cut out a tree when Channels has a far easier time doing the aforementioned task.
By understanding the strengths of each tool, you can make ameliorate decisions, regarding which tool is best for the chore.
Final Thoughts On Cut Out Images In Photoshop
Learning how to cutting out an image in Photoshop is difficult. There's no way around it. There'southward a lot to retrieve and it all feels very overwhelming. My advice would exist to offset simple and use automatic selection methods like the Quick Selection and Object Selection Tools.
Once you lot've gained some confidence with the cutout process, step into the more avant-garde methods like the Pen tool and Channels.
If y'all're feeling overwhelmed by this bespeak, don't feel bad. Have you ever heard the saying: "Photoshop wasn't learned in a day"? Well neither have I, just it'due south completely true. Photoshop can exist challenging to learn without the correct guidance and direction. That's why I created my Photoshop Essentials Form.
This 7-hour form volition help transform y'all from a Photoshop rookie, into a confident and competent Photoshop wiz. The course teaches you all aspects of the program from layers, layer masks, smart objects, hidden features, cutout methods, professional photo editing workflows and then much more.
My Photoshop Essentials Class has over 100 learning outcomes throughout all ten chapters of the course. It's the Photoshop resource I wish I had when I was learning and is guaranteed to fast rail your skills better than whatsoever other method currently available online.
If you want to learn more about my beginner Photoshop Course, CLICK Here. You won't want to miss out on this one.
Happy Editing!
-Brendan 🙂
Source: https://www.bwillcreative.com/how-to-cut-out-an-image-in-photoshop/
Posted by: greenebeinale.blogspot.com
0 Response to "How To Cut A Section Out Of A Picture In Photoshop"
Post a Comment